Want to create your own custom private name servers? If you are getting confused with this title, then I’ll start with a basic explanation. Name servers are a part of Domain Name System (DNS) and they use domain names instead of IP addresses for server connection.
If you take Google, they have name servers like ns1.google.com, ns2.google.com, etc., and even our Slashsquare network has name servers like ns1.slashsquare.org, ns2.slashsquare.org, etc. By default, when you are connected to your server (say InMotion Hosting or A Small Orange), then your name servers will be like ns1.inmotionhosting.com or like ns1.asoshared.com, so it varies according to web hosting services. If you take GoDaddy, then they don’t actually use their own name for the name servers, instead, they use something like ns27.domaincontrol.com.
Hope you got what this is about. If you want to create your very own branded name server, then you can follow this guide. If you are running a brand ‘Example’, then it’ll be nice if you can look professional with a branded name server like ns1.example.com right? Not everyone wants or loves this, but let’s be different.
Creating Custom Private Name Servers
For this tutorial, we are going to use the popular domain registrar service GoDaddy and the steps will be almost the same for every server/registrar I guess.
Step 1: Log into your GoDaddy account. Click on your desired domain name and go to the “Domain Details” section.
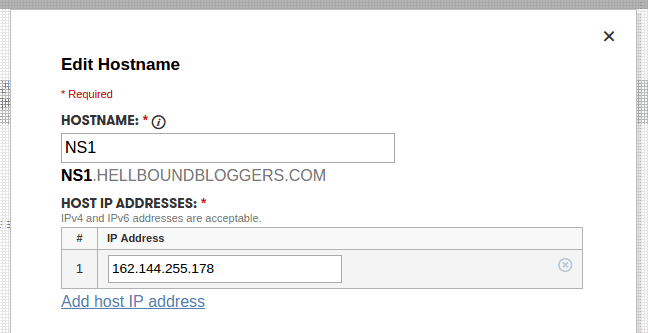
Step 2: Under the ‘Settings’ tab, go to ‘Host Names’ section. Click the link ‘Manage’. Now, enter your host name (say ‘NS1’) and host IP address (IPv4 and IPv6 addresses are acceptable). Click the ‘Add’ button.
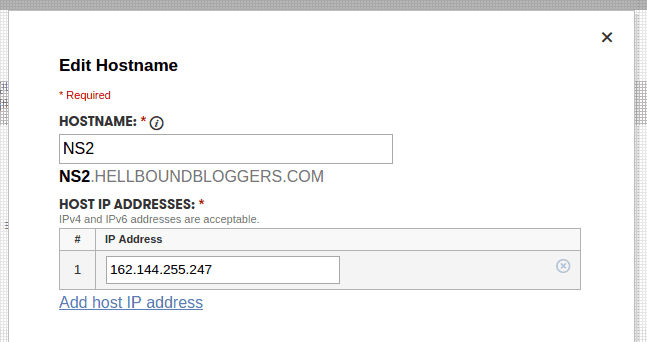
Repeat the same for the next host IP address, here you can enter the host name as ‘NS2’, just to follow the order. Then click the ‘Add’ button. (If you are not sure about your host IP address, then you can contact your hosting support and ask them)
That’s it. We are done with the ‘Host Names’ section successfully.
Step 3: Now, in the ‘Settings’ tab, go to ‘Nameservers’ and click the link ‘Manage’. Nameserver settings window opens and for the ‘Setup Type’, choose ‘Custom’. Then click on the link below named ‘Enter custom nameservers’.
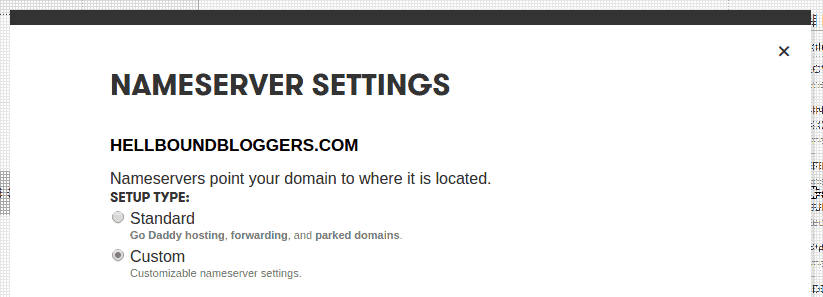
You can enter the custom name servers here. If your domain name is ‘hellboundbloggers.com’, then you can enter the name servers like ns1.hellboundbloggers.com and ns2.hellboundbloggers.com. Then click on the button ‘Add Nameserver’.

Tada! That’s all we have to do. Now, it might take some time for the DNS propagation, but these are the steps for creating a private name server.
In our case, we did the same private name server thing for slashsquare.org domain name as well, since we use the same server, we kept the ns1.slashsquare.org name server for hellboundbloggers.com as well. You can also do the same if you have a company or if you running an organization.
Hope we cleared everything related to the creation of private name servers in this article, if you have any issues or queries, kindly let us know in the comments below.


This is interesting. Can I do this with shared hosting as well?
I am using a VPS where I can create custom DNS but for shared hosting I’m not sure.
Hi Tauseef, it depends on the hosting, which web host are you using?
Inmotion shared support this feature bro
@Santosh Veer Is inmotion hosting fastenough in India?
Review please if possible .
Yes, it’s one of the best we have used so far. 🙂
http://www.inmotionhosting.com/hellboundbloggers-promo