A client of mine asked me whether Facebook Pixel is like a Cookie, I guess I can say ‘Yes’. It’s more or less the same way it processes the whole thing. It tracks what happens and why it happens. Now let’s see why you need to create and install Facebook Pixel conversion on your website.
Why You Should Use Facebook Pixel?
You can use Facebook Pixel (‘Updated’ Conversion Tracking Pixel) for measuring, optimizing and building audiences for your ad campaigns. Facebook Pixel = Conversion Pixel + Custom Audience.
Facebook will soon remove conversion tracking pixel this year and it’s time to say ‘Hi’ to Facebook Pixel. You can now use this for conversion tracking, optimizing ads, retargeting and remarketing. I personally use this for building custom audience from our blog for Facebook Retargeting. I want to understand our blog/website audience for better conversion. We spent a lot on Facebook Ads for our blog network and it’s good to see the ROI in this way.
Create Facebook Pixel Conversion
Go to Facebook Ads Manager, click on ‘Tools’ > ‘Pixels’ to create a tracking Pixel.
![]()
Give a related name for your Pixel, since I’ll be implementing this on our blog ‘HBB’, I decided to go with ‘HBB Pixel’. Read and Agree to the Facebook Pixel Terms, then click on the button ‘Create Pixel’.
![]()
That’s it. You have created your Facebook Pixel for Retargeting and Remarketing, it’s ready now to implement. So you have two options here, if you are geeky enough to edit your website theme then click on the ‘Install Pixel Now’ button and you’ll see the Pixel code (JavaScript code).
Or if you are not willing to take a small risk, feel free to click on the ‘Email Pixel Code’ button and you’ll get an option to email this to the concerned people, say your website developer or a friend perhaps?
![]()
Install Facebook Pixel Conversion
Installing this is very easy to be honest, just like you do the Google Analytics thing or Google Webmaster Tools (now Search Console) verification thing. So anyways, copy the Pixel Code and paste it between the <head> and </head> tags in your website code.
You can also find your unique Facebook Pixel ID here. It’s just a bunch of numbers, it’ll be used in your tracking code. You should only use one Conversion Pixel code for each page on your website where you want to track the conversions.
![]()
If you are running a WordPress blog, then it’s pretty easy, go to Appearance > Editor and check out header.php file. This is the most common file for <head> tags.
![]()
Facebook Pixel And Custom Audiences
If you are done with the Facebook Pixel installation, then we have another small tip for you. Creating ‘Custom Audiences’ for your brand will help you a lot during Facebook remarketing. By this, you can avoid fake audiences and focus on the people you have already encountered during your Facebook Ads experience. Now let’s start building.
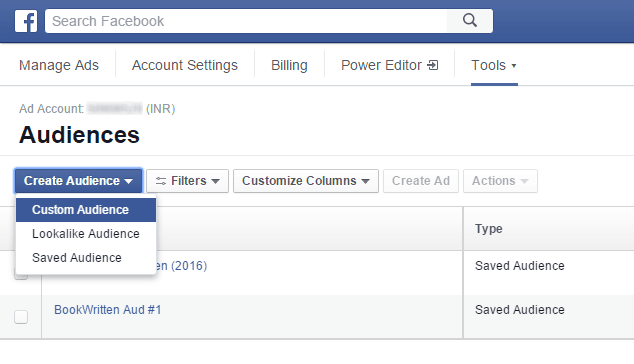
Go to Facebook Ads Manager, click on ‘Tools’ > ‘Audiences’. Then under the ‘Create Audience’ section, select ‘Custom Audience’.
Now you have to choose the type of audience you want to create on Facebook. You have Customer List, Website Traffic or App Activity. Since we are sharing this tutorial on a blog, I’ll go with the second option – “Website Traffic”. If you want to grab customer details or improve your app, then you can proceed with the 1st or 3rd option later.
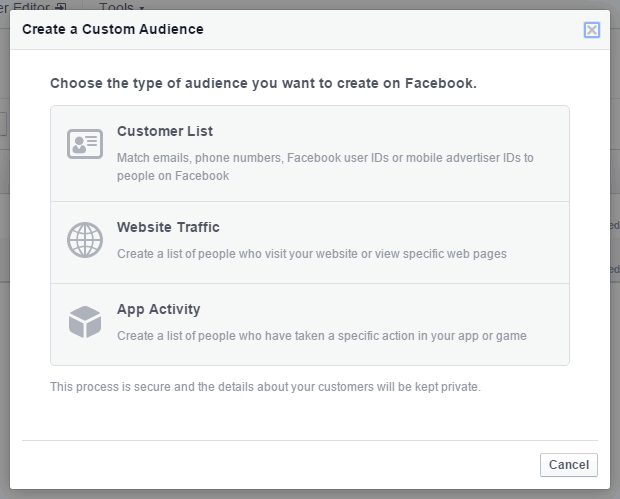
Since we are just going to experiment with this at the moment, we’ll keep the default options. You have three options here:
1. Website Traffic (Anyone who visits your website)
2. In the Last (30 days + include past website traffic)
3. Audience Name (Just give your Business name + add a description)
That’s all. Now click on the ‘Create Audience’ button. You can mix these options when you get time and see the results.
![]()
Now whenever you are running a Facebook Ad (or Boost) you can use this Conversion Pixel for better tracking. You can find it under ‘Tracking Conversions’.
“A conversion-tracking pixel is a small piece of code that lets you keep track of conversions, such as purchases and sign-ups, on your website.”
![]()
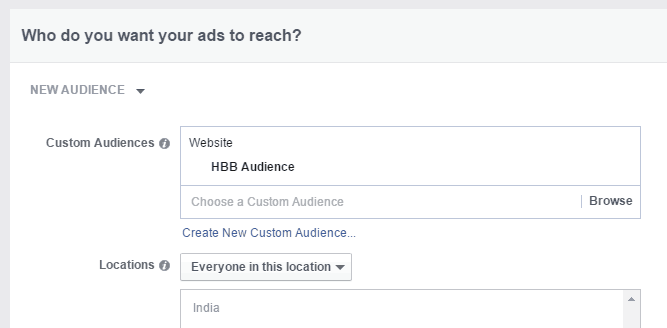
Likewise, you can use the custom audience you created for Facebook Pixel in your upcoming Ad Campaigns.
We are experimenting a lot with this awesome Pixel conversion thing, we’ll surely update this post further with all our results and suggestions. It’ll take just around 10 minutes maximum to create and install Facebook Pixel, so do give it a try and let us know your feedback in the comments below. Also, if you have any issues configuring this, we are here to help you out.


Even i was thinking to install Facebook pixel. Thank You Pradeep you’re doing great job! here.